|
Laying down grass sod to start or repair a lawn isn’t the hardest yard task, but it is labor intensive and requires knowing more than “green side up.” But don’t be daunted. If you have a bare or barren patch of yard, sod is a moderately priced way to turn a brown or weedy patch into a green, lush lawn. Here’s how to lay sod, in six steps. Step 1: Prepare your soilIf you want to lay down sod, you probably want to start by shopping for sod. Don’t. Push sod purchase down on your to-do list. The key to creating a successful lawn from sod is preparation. Soil preparation will likely take longer than laying the sod, so don’t buy sod well in advance. Get the prep work done first. If the reason you are laying down new sod is that the old one died, full stop. You have an extra step ahead of you that others don’t: You must figure out what went wrong the last time so it won’t happen again. “Before purchasing any new sod you’ll need to take a few critical steps,” said Dr. Becky Grubbs, turfgrass specialist for the Texas A&M Extension Service. “Start by putting on your detective’s cap. Let’s figure out what might have gone wrong before, so we can keep it from going wrong again.” Common lawn failure reasonsCommon reasons for lawn failure, Grubbs said, are:
To solve these common problems: Evaluate your lawn area and see how much light it receives. Will the common sod in your area be able to thrive on the amount of sun it will get? Inspect your irrigation system. If it is an in-ground system, run it under close scrutiny. See “Keep Your Lawn Healthy With a Sprinkler Audit” for details. Get one or more soil tests. It will tell you what your soil lacks so you can buy the right fertilizer and the right amendments. Soil test kits usually say to dig up and blend soil samples from all over your yard. But if you have had a lawn failure, consider multiple lawn tests because your front lawn may harbor different issues than the back lawn. Once you get the results of the soil test or tests, follow the advice. Adjust the soil’s pH level and add nutrients as called for by the test results. While you’re at it, use a soil probe or a trowel to dig down into your soil to see how many inches of loamy topsoil you have. If it’s just a thin layer, consider adding another inch or two of organic matter mixing topsoil and compost. Step 2: Deal with old sodIf your old lawn just has a small, pitiful remnant, put it out of its misery and scrape it off. A flat shovel will do the trick You can consider chemical means of removal but take care. Products containing glyphosate, for example, are highly effective and relatively inexpensive. Sold for years under the name Roundup, this broad-spectrum herbicide is approved for use by regulatory bodies worldwide. Yet it’s become controversial due to concerns about its toxicity and potential links to cancer. Since the controversy arose, manufacturers have produced glyphosate alternatives. Alternately, you could rototill a remnant lawn into the dirt with a rototiller, taking care to first mark the locations of sprinkler heads. But that’s not necessarily a good choice. You could spread a lot of weed seeds and still-living roots under your fresh lawn — competition your grass doesn’t need as it’s just getting established. And if you haven’t really killed the old grass, it could interfere with your new sod’s growth. “What you should do, whether you should remove the material or not, is situation-specific,” Grubbs said. “It’s going to depend on the soil test as well as the amount of grass that’s left on the soil and your ability to adequately till it in.” Should you decide to remove the sod on a large area, professional landscapers will have access to sod cutter machinery that makes the job less back-breaking. Step 3: Till the soilWhether you decide to remove the old lawn or leave it, tilling is the next step. Over years of use, grass becomes compacted, especially in areas where clay soils are common. Tilling breaks up the soil to let the new sod’s roots reach down deeply to establish the lawn. 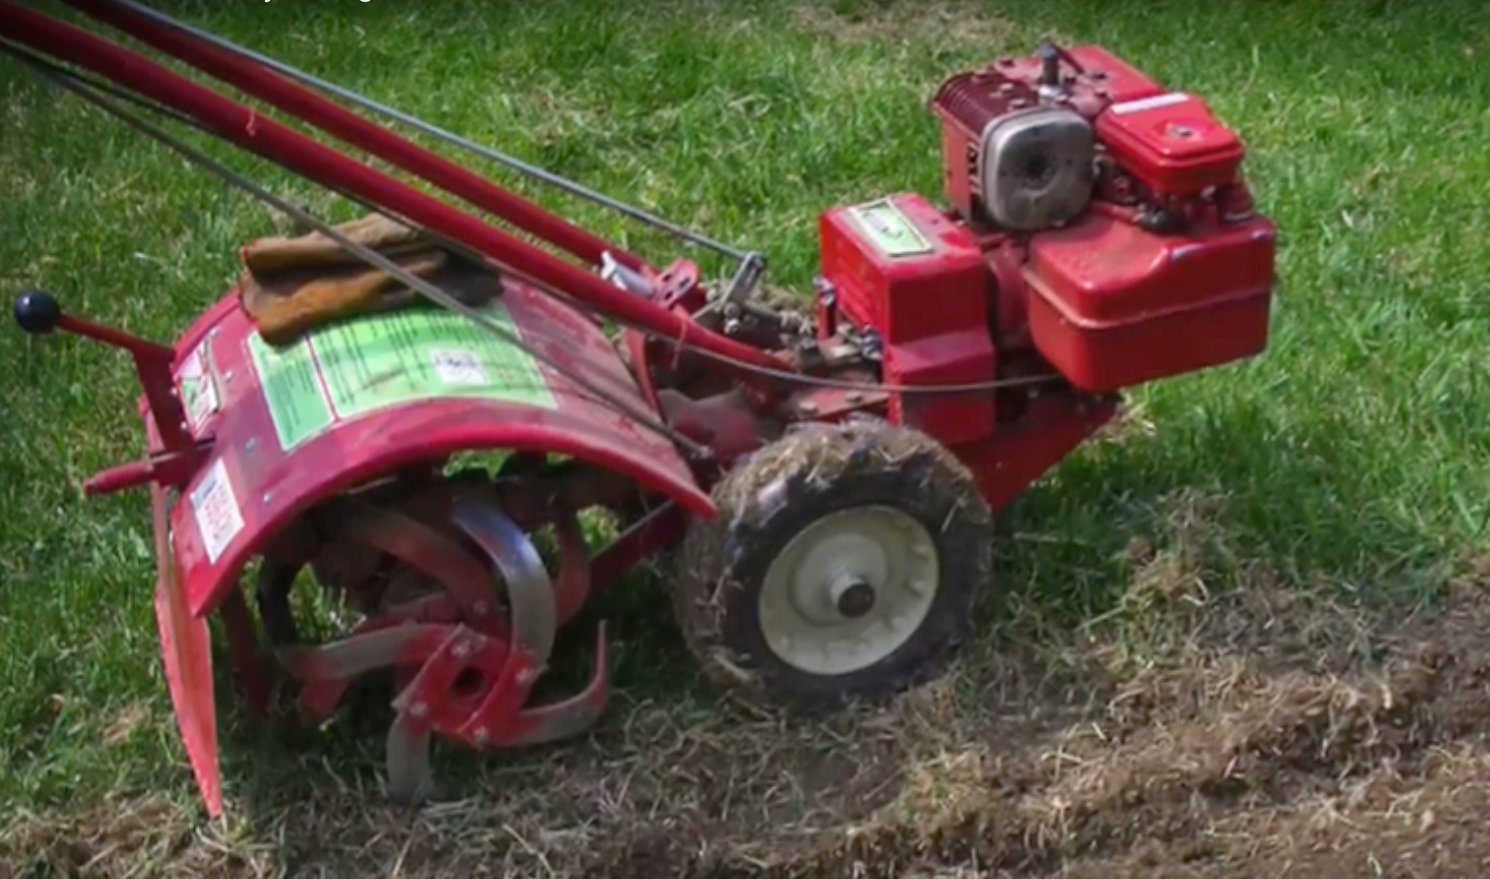
You can fertilize the soil under the sod before it is laid down, or on top of the sod after it’s laid down. See how much topsoil you have. While sod will grow on most soil types, you’ll give your sod the best chance of success with loamy soil, neither too clay-ey or too sandy. Fertilize responsibly. The chemicals in fertilizers — especially the potent starter fertilizers used on new lawns— have contributed to water pollution. Sweep up the excess from paved areas and deposit it back on the ground. Don’t wash it into the drain. In many states, you may not apply fertilizer containing phosphorus, except on new lawns. The water-pollution caused by this common fertilizer chemical has caused 25 states to impose restrictions on its use. Don’t forget to level your soil. Leaving hills and valleys in your dirt will complicate your mowing later. Pay special attention to the areas adjacent to curbs and sidewalks. Use a rake or flat shovel to lower the soil level by an inch or two. Sod that rests too high next to concrete will dry out and die. Step 4: Buy your sodSod has a short shelf life of only a few days after harvesting, depending on the grass type and the weather. When purchased in rolls, sod tries to keep growing after being rolled. The heat produced in the process can kill the roll from the center out. Calculate your lawn’s size in square feet. Prices are generally quoted in price per square foot or price per pallet. A pallet generally covers 450 square feet. Prices for grass sod in 2019 are running at about $0.30 to $0.80 per square foot, depending on the sod farm and the grass type. Sod installation prices run from $1.20 to $1.80 per square foot. A spot check of pallet prices around the country found a range of prices from $115 to $230 per pallet, with delivery charges extra. At those prices, the cost of sodding a 1,000 square foot yard could run from as little as $300 for a do-it-yourselfer to $1,800 for a fully installed patch. Sod costs considerably more expensive than grass seed, which can cost as little as $30 for a bag that will cover 1,000 square feet. Planting a grass lawn from seed is a much slower process, however. Local garden centers are convenient and will usually carry the most-common varieties for your area, but purchasing directly from a sod farm may give you more choices and expertise on grass types. Step 5: Lay down the sodWith the preparation done, you’re ready to lay sod. The pros have a few tips, and they begin with one realization: You work hard in the yard laying sod. Even on a mild spring day, you’ll end up hot, sweaty and dirty.
Lay down your sod lawn in narrow strips, starting your first row with the longest continuous fixed, straight edge (whether that’s your house, the driveway or sidewalk). As you continue, lay in straight lines, but stagger the short ends in a brick-like pattern so you don’t have one long seam. It’s more pleasing aesthetically and having long seams encourages water to channel and makes seams come apart and become exposed. As you lay sod on the entire area, butt in pieces tightly, leaving no gaps. Take a sharp knife to cut pieces of sod to fill in the gaps that will be left by your brick pattern. The knife will also cut around sprinkler heads and irregular shapes. Remove any air pockets. DG Turf Farm of Greenleaf, Idaho, recommends using a lawn roller one-third filled water. Or there’s a low-tech alternative: Carefully but methodically walk across the sod with your feet close together. You want to encourage the new to make good contact with the underlying topsoil. If the lawn includes sloped areas, they need to be staked. Sod staples for this purpose are inexpensive and available at most garden centers. Common mistakes in laying sod:
Step 6: Water and fertilize your sodAll this hard work will go for nothing if you do not keep a close eye on your new sod’s water needs. According to Turfgrass Producers International, “It is essential to begin watering new turfgrass sod immediately upon establishment.” Expect to water lightly but frequently during the establishment period. Check to make sure that the water is through the sod pieces and an inch or two into the soil beneath the sod pieces to encourage a deeply rooted, lush lawn. You neither want it to ever dry out or stay saturated. Remember, to establish a green lawn, dry is bad, mud is bad, moist is good. 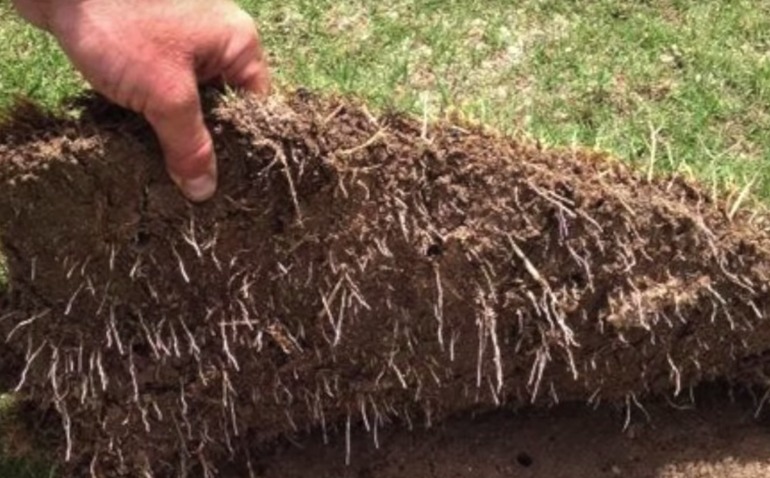
During this time, check by lifting up corners of sod and resume watering when the sod is beginning to dry out. Soon, you should see roots breaking through the bottom of the sod pieces. Soon after that, the sod should start resisting your gentle tug at the corners. At that point, you can back off the watering and go to a schedule of watering occasionally, but deeply to a depth of about six inches of water, so the roots are encouraged to grow. Water early in the day to avoid evaporation and disease. Once the new lawn gets to 3-4 inches tall, you can mow the yard, but do so gently. Avoid ripping out those still-tender roots, so either you or your lawn care professional should make the mower turn on pavement rather than on the grass. Mow tall to encourage a solid and strong root system. The post How To Lay Down Sod for a Yard: 6 Steps appeared first on Lawnstarter. from https://www.lawnstarter.com/blog/lawn-care-2/how-lay-down-grass-sod-yard/
0 Comments
Leave a Reply. |

 RSS Feed
